Powder Coat Part 1: What can you do?
Click image to see larger picture
I will talk about the method to apply powder later, for now let’s just look at the steps to produce this air scoop.
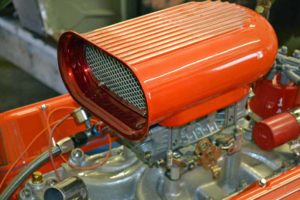
The air scoop above is a recent project that I produced. All totaled, it probably took a full day to complete. Most of the elapsed time was wait time for the parts to either heat up or cool off.
The original scoop was purchased as a natural raw aluminum scoop. The part that attaches the scoop to the carburetor was bare steel. Again, let’s just talk about the steps here and we will talk about the equipment and powder later.
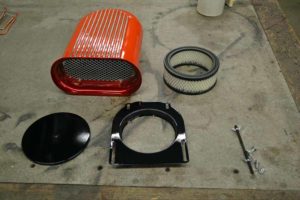
First step is to sand blast all the pieces. And yes, if it was polished aluminum I would still sand blast it to give the powder tooth to hang on to.
Sacrificial bolts are screwed into the threads on the bottom of the scoop that holds the bottom piece of metal to the scoop (you can hang onto these bolts and use them over and over again).
Once the surface was sand blasted and wiped down, the whole piece was powder coated Super Chrome. No special masking was done and the whole piece was evenly powder coated with the chrome powder.
Then the whole piece was coated again with the red candy (the red candy powder is a top coat that protects the super chrome). The red candy will remain visible on the mouth of the scoop and the inside.
Next the mouth was taped off at the edge and the bottom opening was taped off. There is special tape and we will talk about that when we talk about materials and supplies.
With the red candy covered with tape the whole piece was powder coated with Chevrolet orange. After the piece cooled, the raised fins were ground down with a die grinder equipped with a two-inch 80 grit sanding disc.
To protect the raw aluminum on the raised fins and to remove the raised line between the candy red and the Chevrolet orange, all the tape was removed and the whole piece was coated a final time with gloss clear (powder).
Besides removing the edge between the candy red and the Chevrolet orange, the gloss clear powder adds dimension, deepens the colors, heightens the gloss, and helps protect against scratches.
The final step is to coat the raw steel bottom piece with gloss black and again with the gloss clear for the reasons stated above. Although the gloss black will stand up to abuse by itself I put gloss clear on top of it and all the solid colors I use.
The only real skill required to produce this piece is the taping. Application of powder coat is much easier that spraying paint using rattle can. It is almost impossible to put enough powder on to produce a run when curing. It is possible to put too little on and that will produce a “dry” rough surface. If this happens you can sand and re-spray the piece with powder, it is not necessary to take it all the way back to bare metal.
The intake and the valve covers in the pictures above were also powder coated in the same manner.


